Do you want to make your own characters in character.ai in that you can customize yourself? Maybe you want a character with your preferred voice or description, or maybe you want to make it for the community to use and enjoy. Well in this guide I will guide you through how to make your personalized Character in the character.ai application.
What is Character.ai?
Character. ai is a special tool that assists you in making characters with the help of artificial intelligence or in other words, AI. It was created by a group of professionals who felt that character creation should be fun for everybody. The tool was developed in 2021 by former engineers of large tech companies like Google.
What Can You Do with Character.ai?
With Character. ai, you can create new types of characters for any story or game that you are working on. The tool helps to make your characters talk and make them communicate with each other.
It is possible to depict your characters with unique personalities and traits which help to create an illusion of real people. Also, you can generate images of the main characters according to your descriptions and see how your imagination works in this case.
Step by Step to Make a Character
On Desktop
1. Sign up or Sign in
First sign in or sign up to your c.ai account.

2. Create a Character
Here you can choose other characters made by the community or by the company, but since we need to make our own so go to Create>Character.

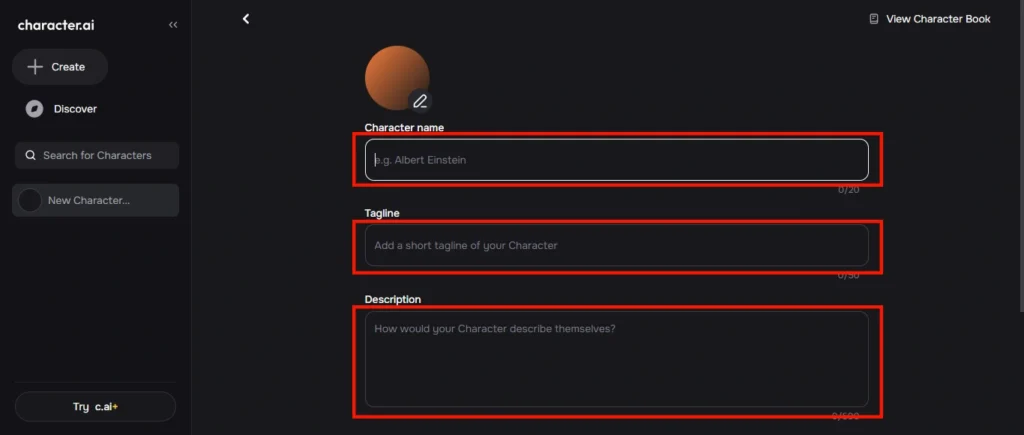
3. Fill out the details
Now, fill out your character details like “Character name“, “Tagline” and “Description.”
4. Add Greeting
You can also add a greeting. The greeting is the first thing your character will say when you interact with it.

5. Add a Voice
You can also add a voice, there are two options either you can select a voice provided by the company or you can also upload your own.

6. Visibility
There are three options, if you choose “Public” anyone can interact with your character. If you choose “Unlisted” anyone can interact with it via your link. Lastly, if you choose “Public” your character will be only available to you.

7. Create Character
If everything is done, then click on the “Create Character” button to make it.

8. Chat with it
Now you can interact with your character. Make sure to not use any banned terms with it.

On Mobile
1. Sign up or Sign in
Sign in to your c.ai account on your mobile phone.
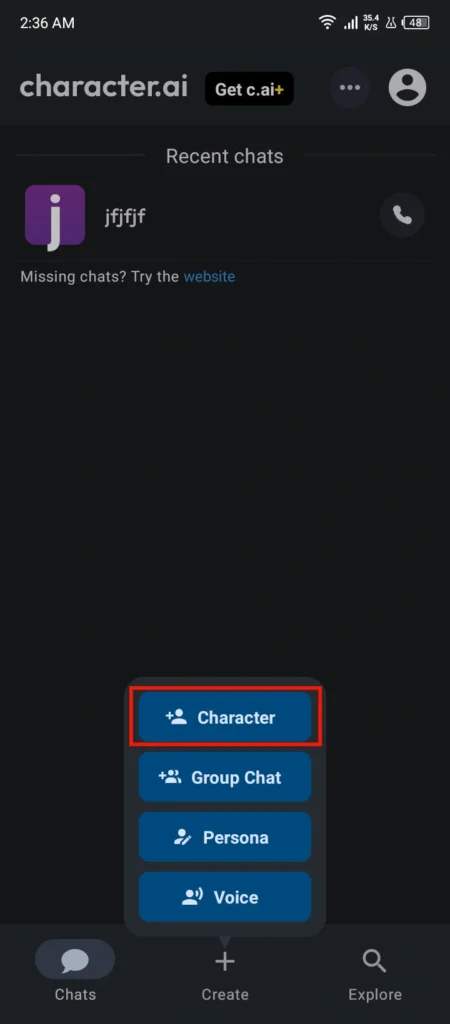
2. Create
Then go to Create>Character on the app.
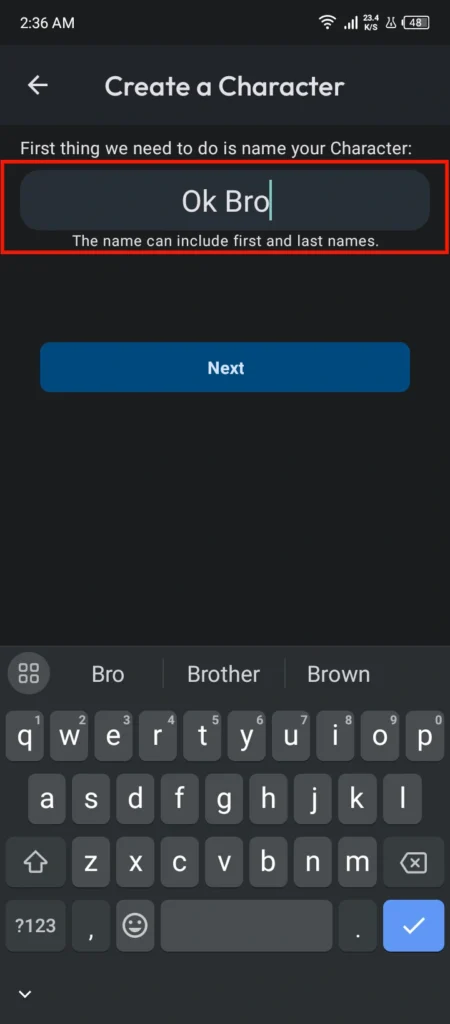
3. Choose a name
Name your character. Make sure the length should be a minimum of 3 characters.
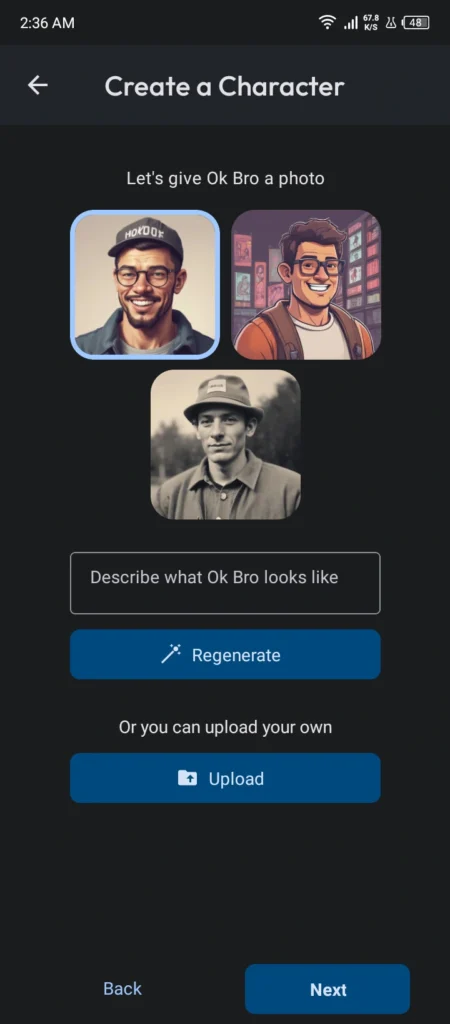
4. Choose an image
In this step, you can either generate an image or upload an image for your character. If you click on the “Regenerate” button it will generate a profile picture according to your character name.
5. Greeting
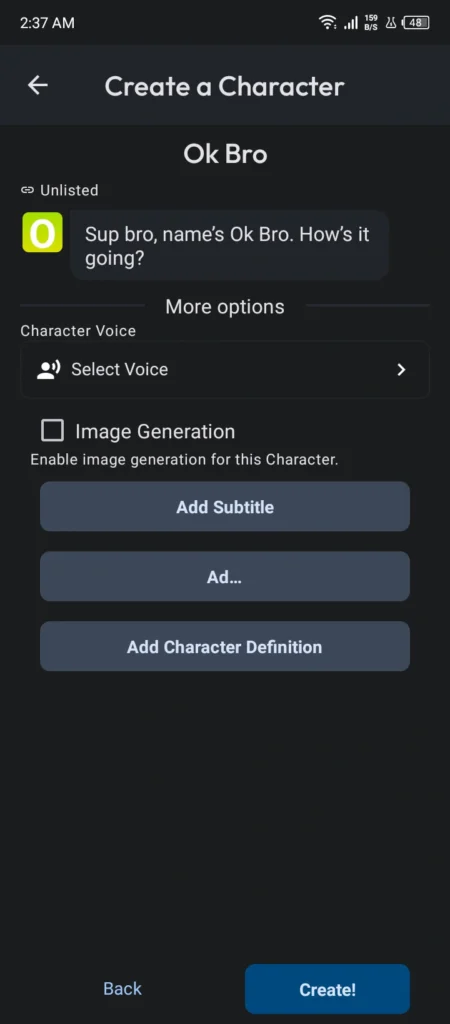
Type a greeting. You can also generate it by clicking on the “Generate it for me” button.

6. Visibility
Same as on desktop you have three options here, either to make your character Private, make it unlisted, or make it public for everyone.
7. Remixing
This gives you two options if you select “Remixable” others can use your character as a template, but if you choose “Protected” they can not use it as a template.

8. Add a voice
Now add a voice if you want, you can select a voice or can upload any voice you want.
9. Interact with it
Here you go. Now your character has been created. Communicate with it. Make sure to follow the guidelines provided by the app.
Conclusion
I am sure by following this guide you will learn how to make a character in the c.ai app on mobile and computer. Some steps are optional, so follow the app instructions while creating your character. Remember that there are some filtered and banned words you cannot use in this app, so please follow the guidelines and don’t breach any policies.
